Showing posts with label Techniques. Show all posts

Monday, January 11, 2016

Birthday Blooms in Watercolor HSS229

Pin It Now!
Hey crafty friend! Today I'm sharing a watercolored card with a beautiful new stamp set from the Spring Occasions Mini, Birthday Blooms.  It's just perfect for our current color combo over at Hand Stamped Sentiments

Using an aqua painter and ink pads, the colors are layered to create deeper and lighter shades on the petals and leaves, and Sahara Sand is washed all around the image to give it depth.  Our Sahara Sand lace trim is perfect to finish it off! 
Definitely a new favorite stamp set!  
SUPPLIES:
STAMPS: Birthday Blooms
INK: Elegant Eggplant, Always Artichoke, Sahara Sand, Memento Black
PAPER: Watercolor Paper, Sahara Sand CS, Elegant Eggplant CS
ACCESSORIES: Sahara Sand Lace Trim, Vintage Faceted Button, Linen Thread, Basic Rhinestones


Monday, December 29, 2014

Sparkly Watercolor Thank You - HSS202

Pin It Now! With Christmas done, and the New Year upon us, I'm looking for something gold and sparkling to celebrate and to thank a friend.  The latest inspiration photo at Hand Stamped Sentiments is full of gold and glimmer, perfect for celebrating kindness!  Here's my shiny card...
And the inspiration photo from HSS
I loved getting out the watercolor supplies for this one.  Look at this shine!
I watched a YouTube video to work on my "bokeh" technique, which are the circles that are randomly placed on the card panel.   
To create this effect, I first wet the entire watercolor paper panel with clean water.  Then, I squeezed each ink pad while closed to apply ink to the inside of the lid - if you have reinkers, you might use them instead.  I dabbed the ink off of the lids with a wet paintbrush, then dab and spread the paint as desired.  I created a diagonal type pattern. 

When I like the color combination, I dried it with a heat embossing gun.  Then I watered down a bit of the Champagne Mist from Tsukineido and brushed it all over the top, dried again, then used it full strength on a skinny paintbrush and flicked it across the panel.  
This is what it looked like before the Craft White ink circles were dabbed on.  In hindsight, I think it would have been fine like this! 
Inside, more stars to match the punches on the front. 
Hope you're having a great Christmas season and a wonderful New Year!  Head over to Hand Stamped Sentiments and play along - I'd love to see you there!

SUPPLIES:
STAMPS:  Simpky Celebrate (retired)
INK:  Crushed Curry, Night of Navy, Tempting Turquoise, Tsukinedo Champagne Mist, Memento Tuxedo Black
PAPER:  Modern Medley DSP, Watercolor paper, Basic Black, Whisper White, Gold
EMBELLISHMENTS:  Confetti Stars punch, Gold Bakers Twine, Large oval punch, Crystal Effects
OTHER: paint brushes, craft mat, washi tape, water


Thursday, August 7, 2014

Starburst / Sunburst Cards - Birthday & Thank You

Pin It Now! What's a prettier way to show off patterned paper than in this lovely starburst pattern?

This birthday card is done using the All Abloom DSP stack.  It's perfectly sized to make the triangles for the starburst; mine are 4-1/2" x 1-1/4".  The cute sentiment is from Something to Say.

I just love these colors!

And how about a couple of shiny sequins?

Here's my first sample - I used retired Afternoon Tea DSP to experiment with.  Love these, too!  I sent this one to my mom!
Have a great day!  

Monday, July 28, 2014

Another Great Year - Birthday Greetings!

Pin It Now! I have had a fascination with this stamp set since I first set eyes on it!  Then it sat...and sat.  I wasn't sure what to do with it.  I love the scripty font, the festive banners, and the vintage feel it has.  This week's Hand Stamped Sentiments Inspiration Challenge gave me the jump start I needed, with the cute retro mixer in aqua & silver.
I went with the silver and aqua theme, with a touch of purple from the other photos.
I saw a cute sponge dauber polka dot card by Teneale Williams, and thought this was just the technique to use with this festive birthday stamp! Sponge daubers dabbed in Coastal Cabana, Certainly Celery, and Wisteria Wonder. The birthday sentiment is heat embossed with silver, colored with Coastal Cabana, and a few sequins are added.  
I used this trendy tilted layered look, and I like the way it adds interest to the dotty panel, with plenty of patterned paper peeking through.  
Inside, a greeting and a cupcake!
I'll definitely be turning out a few of these.  Super easy and really darned cute! 

Hop on over to Hand Stamped Sentiments and check out the DT samples - and please join in the fun!  

Check out Teneale's card here, with the dauber technique!

Have a blessed and creative day!

SUPPLIES:
STAMPS:  Another Great Year
INK:  Coastal Cabana, Wisteria Wonder, Certainly Celery, Silver Stampin' Emboss, So Saffron, Blushing Bride
PAPER:  Coastal Cabana DSP from In Color Stack, Watercolor Paper, Smoky Slate, Very Vanilla
EMBELLISHMENTS:  Coastal Cabana Thick Twine, silver sequins, glimmer paper


Monday, April 21, 2014

Hello! I must be going! Fun with retiring stamps {HSS184}

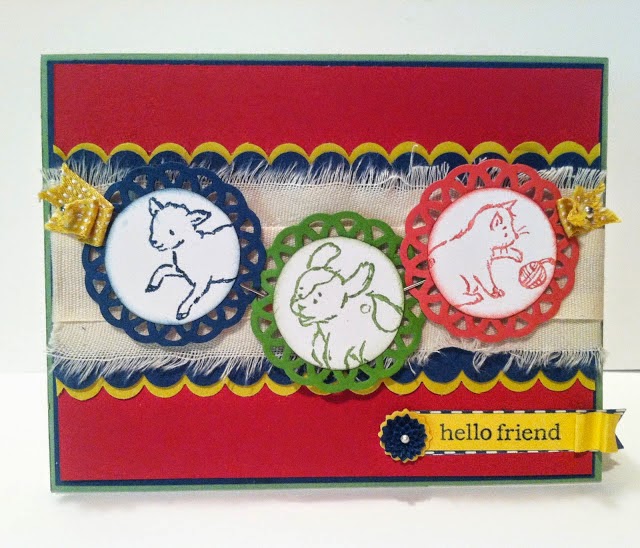
Pin It Now! I spent a portion of my morning going through all my stamps sets and marking my retiring stamps.  It's always bittersweet.  Is it silly to feel an attachment to stamp sets?  This fun fringe card was made with two retiring sets - Storybook Friends and Happy Day.
The layout of the card is from our latest sketch challenge at Hand Stamped Sentiments.  I flipped the sketch, and took the liberty of leaving it upside down so that you can see how "right on" I was!  Haha. You are welcome to turn it back upright for your card, or sideways if that floats yer boat.
If you haven't tried using Stampin' Up!'s Fringe Scissors, you absolutely must!  They are SO fun and easy to use.  What a great dimensional effect, and it gives the card an ombre look with the graduated shades of pink.
Here are a few tips on creating an ombre fringe card:
1)  It looks best if the card base is long ways, i.e. opens from the bottom and not the side.
2) The strip of cardstock I used to layer this card are 4-1/4" x 1-1/2", and scored at 1" to mark where to stop cutting with the fringe scissors.
3)  It helps to open the scissors wide to make your cuts, and not to cut until the scissors close.  This prevents unnecessary twisting and tearing of the cardstock. 
4) The fringe cuts in the scissors seem to be spaced so that your 4-1/4" pieces will have perfectly spaced fringes, right up to both ends!  Neat!
I was tempted to color the little critters with an aqua painter, but let it go black and white, like an old cartoon.  
If you decide you can't live without Storybook Friends, there's time to order it before it's gone!  Contact me today to order!  Happy Day, too - available while supplies last!  Below are links to the retired lists.
SUPPLY LIST:
STAMPS:  Storybook Friends, Happy Day
INK:  Versamark, Black Stampin' Emboss Powder
PAPER:  Subtles DSP Stack, Pink Pirouette, Blushing Bride, Strawberry Slush, Pistachio Pudding, Whisper White
EMBELLISHMENTS:  White Organza Ribbon
PUNCHES:  1-1/4" circle, 1-1/2" circle
TOOLS:  Fringe Scissors
  
PS:  Here are a couple of the cards I made with Storybook Friends last year!


If you plan to place an order, here is a HOSTESS CODE for your convenience!  TPQAW6RB

Have a blessed and creative day!

Monday, December 16, 2013

Sketch Full of Sneak Peeks! HSSSC175

Pin It Now! Tis the season to be busy!  I've had a box full of sneak peek products from the upcoming Spring Occasions Mini and Sale-A-Bration for over a week now (even paid for expedited shipping!) and finally have had time to make a birthday card for my mom using this week's sketch at Hand Stamped Sentiments!
Most of the supplies are from a mini album kit - Mini Memories Simply Created Album Kit, and I've broken out the kit so I can use it for cards because all the elements of it are so sweet!  It has a little bit of everything...the paper bag, doily, the large sequin, and the lovely gold baker's twine are all from the kit.  I've cut apart the tulip printed bag and sanded it a bit to tone down the white, and there's plenty of it leftover for more cards.
The stamp is from the upcoming Another Great Year set, and it has the BEST birthday stamps...you'll see the largest one below on the inside. "Wish Big" is embossed with white and watercolored with Wild Wasabi and Calypso Coral. A few sequins and a bow from the twine embellish the sides of the Natural Composition DSP frame.  
I love the watercolor trend!  It was very easy and I didn't have to worry about getting things perfect.  See the muslin banner there?  It's part of a Sale-A-Brations freebie! A super lovely banner kit called Heartfelt - OMGoodness I LOVE it!  There are POM POMs in it! The top of the banner is punched with a new Scalloped Tag Topper Punch.
Inside is a show stopper sentiment with a little more watercoloring brushed on. 
So, do you have a little time set aside for stamping during this busy time?  Head on over to Hand Stamped Sentiments and play along!  


Thursday, August 15, 2013

Cigar Punch Art Card with Masking Tape Ink Technique

Pin It Now!
My day's birthday is this weekend, so I needed to make a nice, manly card for my poppa!  He likes two things that many men like...cars and cigars. I've made him a lot of car cards (tongue twister) in the past (check out my other masculine cards here) , so I decided on the latter this time. Which worked out nicely to add a cigar gift card inside! 
This card was so fun and easy to make!  I watched a new video by Lisa Curcio on Stampin' Connection which teaches an inking technique using masking tape. You can view Lisa's video below.
Here's how it looked when creating the ink layers for the cigar.  I used three browns for the cigar-Baked Brown Sugar, Crumb Cake, & Early Espresso. Then the metallic gold ink pad (ADD LINK) from the holiday mini for the band & the end of the cigar, as well as inking the striped embossing folder. 
doesn't this technique work well to show the layers of the cigar?  
I slid a scrap piece of paper in the punching portion (center)
of the punch so my "cigar" would slide easily
in thru the underside of the punch.
 The cigar is 7/8" wide by 3-3/4" long, and I slipped one end into the 1" circle punch to neatly round off one end.

The letters are punched from Etcetera DSP with Bigz Alphabet Typeset and popped up, some single and others double.  "Wish" is from the retired Word Play, layered with That's the Ticket and punched with Ticket Builder Punch.

The band is made using the same masking tape technique, with gold ink, and stamped randomly with "Happy Birthday" from Teeny Tiny Wishes.  

Inside, with Label Love.
I'm playing along with SUO Challenges, which is doing birthday cards this week!  Check them out for fabulous inspiration!  

Have a blessed and creative day! ~ Erika

SUPPLY LIST:
STAMPS:  That's the Ticket, Label Love, Word Play (retired)
INK: Baked Brown Sugar, Crumb Cake, Early Espresso, Night of Navy, Encore Gold Metallic Pad
PAPER: Etcetera DSP, Night of Navy, Very Vanilla
EMBELLISHMENTS: Stylish Stripes Textured Impressions Embossing Folder, Bigz Typeset Alphabet Dies, Ticket Builder punch, Early Espresso stitched grosgrain ribbon
OTHER:  Blue painters masking tape

Monday, July 22, 2013

Sweet Birthday Flip Flop Cards - Ustamp With Dawn & Friends!

Pin It Now! Here’s a fun “Cool Move” suite that I created for the latest Ustamp With Dawn & Friends event, Cards With Cool Moves 2013.

This set features the Flip Flop, or "Flip It" fold.  I created a tutorial showcasing two different ways to make the flip flop - one traditional squares, and an extra fancy one with Framelits.  Fresh new In-Colors - Strawberry Slush, Coastal Cabana and Baked Brown Sugar - make these as fresh as cool summer popsicles!

My tutorial provides step by step directions for each card, including measurements, tips and tricks, and full color photos all along the way.  You can find my project, along with over 40 more fabulous sets, each showcasing a different moving card, by clicking here:

Membership is a one time fee of $24.95 and gives you all-access to the .PDF tutorials, chats, prizes, and photo galleries. Lots of crafty fun!

Monday, July 15, 2013

Vintage Inspired Wiper Card - HSS164 Sketch

Pin It Now!
This week at Hand Stamped Sentiments, we have a sketch to play with.  With trendy hexagon shapes along one side, I couldn’t wait to get started!  

I pulled out lots of new supplies that I haven’t had the chance to use yet…it’s been a busy couple of weeks!  Paper, stamps, my hex punch, and new embellishments, including Chevron Ribbon and the dainty Very Vintage buttons.  With all these supplies in a pile, I knew I would need A LOT of real estate on this card. So I made a “wiper card”. Front, back, sides, and even the inside are decorated with bright colors and patterns.

The patterned paper came from two stacks, the Etcetera and Afternoon Picnic DSPs. Hex shapes were hand cut from a sheet of Afternoon Picnic, and the cute vintage ad on the front was cut from Etcetera.  They both feature Pear Pizzazz, so they blend well!

The front panel uses our sketch at HSS…I turned it on its side.

The “wiper” appears when the card is pulled open from the right and left ends, and “hello, sweet friend” appears.  I love cards with surprises, and I can’t wait to give this one away!

I thought it needed a little space for writing, so the back side is stamped with the new Post Card stamp.

So there you have it, patterns and pop ups all ‘round. Come on over to the Hand Stamped Sentiments blog & see what all the other ladies have created with this fresh sketch!

The Wiper Card was a technique recently posted at the Ustamp With Dawn & Friends Cards With Cool Moves event, and it was so easy to create with the tutorial that Melissa Stout put together.  You can check it out here if you’re
interested.


SUPPLIES:
STAMPS:  Six Sided Sampler, Post Card
INK:  Pear Pizzazz, Basic Black, Baked Brown Sugar (for distressing edges)
PAPER:  Afternoon Picnic, Etcetera, Pear Pizzazz, Coastal Cabana, Crushed Curry
EMBELLISHMENTS:  ¾” Chevron Ribbon in Pear Pizzazz, Very Vintage Designer Buttons, Hexagon Punch, Basic Rhinestone, Pear Pizzazz Baker’s Twine

Have a blessed and creative day!  ~ Erika

Wednesday, June 12, 2013

Father's Day - Something Old, Something New...

Pin It Now! Does Father's Day cardmaking always sneak up on you like it does me? Thankfully I had all morning yesterday to devote to dad cards.

I used RetroSketches for my first card, and it's vintage in more ways than one!
Look here! The supplies I used are from a scrap kit from August 2008! LOL. How's that for using the stash? This kit reminds me of my dad, so I've made him cards from this more than once. He is the parent that gave me my love of old cars, '50s and '60s music, and generally upped my "cool factor" by setting an example of awesome dry humor.
My boys love this card, especially the big dial on the gauge! I like the lettering...the Thickers were raw cardboard, and I embossed them with silver, then grunged them up with black sponging, so they look more pewter.
Inside...
Check out Retrosketches here!
My Father-In-Law's card was decidedly more subtle. He loves golf, and their great room is all golf. I made this so it'll look good on display :)
This is my first attempt at BRAYERING! So it may look a little amateur. But I love the effect. I followed a tutorial by the great Michelle Zindorf HERE, and it really was pretty easy.
Inside is an oldie-but-goodie golf stamp, long retired, but a staple for golf lovers!


So I have one more dad card to do, for hubby. I will give that one a little thought and make it later this week, since it doesn't have to be mailed :)

Have a blessed and creative day! ~ E.