Tuesday, December 30, 2014

New Year's Eve Party Favors - Crackers & Blowers

Pin It Now! Who's in the mood to celebrate?  Has it been a banner year for you, or are you glad to see the new one coming?  Either way, you really ought to have some festive party favors to wave bye to the old or ring in the new.

Here are some easy favors.  I made these for my church friends and some family that I'll be celebrating with.

The party blowers are too cute, and were easy to make. And YES! They do curl back up when you blow them out!  Yay!  I learned to make them from good ol' Martha Stewart here.  I used her measurements.  But I did a few things differently which are:

* I used  paper straws purchased at Target dollar spot.  Didn't cover them with vellum as they suggest.  I wrapped mine with washi tape.  The glittered ones are first wrapped with Sticky Strip, then rolled in glitter.  (You probably don't want to blow on these.  I don't personally mind glitter lips, but that's just me.)

* I used washi tape instead of clear scotch tape to adhere the patterned paper into the long strip.

*  I used Sticky Strip to insert the straw into the paper curl.  NO drying time!

One great tip I learned was to keep them rubber banded tightly curled for 24 hours.  They'll definitely keep their curl better.  I used the tiny Rainbow Loom bands, and they looked kind of cute while I waited.
Then the party crackers!  I love these, they turned out rather elegant.  They'd make a nice 50, 60, etc. birthday party, man's party, or wedding favor. 
Want some measurements?
Inside roll of Typeset Specialty DSP 3-1/4" x 3-3/4"
Outer ring of DSP: 1-1/2" x 4"
Tissue paper - plain white. 10" x 3-3/4"
Fringe cut the edges with fringe scissors.
Ribbon trim 4"
Baker's twine 3" each side

The tag was cut from the circle flip card Framelits set, and the "Happy New Year" comes from retired Christmas Messages which is still available as a digital download!
Have a wonderful, safe, blessed New Year's.  I hope you're surrounded by people you love!

Monday, December 29, 2014

Sparkly Watercolor Thank You - HSS202

Pin It Now! With Christmas done, and the New Year upon us, I'm looking for something gold and sparkling to celebrate and to thank a friend.  The latest inspiration photo at Hand Stamped Sentiments is full of gold and glimmer, perfect for celebrating kindness!  Here's my shiny card...
And the inspiration photo from HSS
I loved getting out the watercolor supplies for this one.  Look at this shine!
I watched a YouTube video to work on my "bokeh" technique, which are the circles that are randomly placed on the card panel.   
To create this effect, I first wet the entire watercolor paper panel with clean water.  Then, I squeezed each ink pad while closed to apply ink to the inside of the lid - if you have reinkers, you might use them instead.  I dabbed the ink off of the lids with a wet paintbrush, then dab and spread the paint as desired.  I created a diagonal type pattern. 

When I like the color combination, I dried it with a heat embossing gun.  Then I watered down a bit of the Champagne Mist from Tsukineido and brushed it all over the top, dried again, then used it full strength on a skinny paintbrush and flicked it across the panel.  
This is what it looked like before the Craft White ink circles were dabbed on.  In hindsight, I think it would have been fine like this! 
Inside, more stars to match the punches on the front. 
Hope you're having a great Christmas season and a wonderful New Year!  Head over to Hand Stamped Sentiments and play along - I'd love to see you there!

SUPPLIES:
STAMPS:  Simpky Celebrate (retired)
INK:  Crushed Curry, Night of Navy, Tempting Turquoise, Tsukinedo Champagne Mist, Memento Tuxedo Black
PAPER:  Modern Medley DSP, Watercolor paper, Basic Black, Whisper White, Gold
EMBELLISHMENTS:  Confetti Stars punch, Gold Bakers Twine, Large oval punch, Crystal Effects
OTHER: paint brushes, craft mat, washi tape, water


Tuesday, December 23, 2014

Show & Tell of Christmas Cards

Pin It Now! Here are a few of the Christmas cards I've received this month. Just beautiful, each and every one!  Isn't it the best when you get one of those "lumpy envelopes" in the mail, and you know you're opening a handmade card?

First up is my friend Julie. I love her creativity, I can see she has combined several stamp sets.
My upline, Linda, sent this Wondrous Wreath card, with the addition of our bird punch!
And you cannot imagine my delight when I got this big, beautiful package in my box. This is a large (about 6x9) gift bag, created by my sweet friend Dee Ann. I adore the gold, the doily, the star! And inside were custom made address labels!  

I hope you're having a wonderful Christmas!

Make something homemade and bless someone!  


Sunday, December 21, 2014

Festival of Trees Quick & Easy Christmas Card

Pin It Now! Here's a quick, fun card using the coordinating punch and photopolymer stamps in the Festival of Trees bundle.
The punched tree fits nicely into a circle punched with the 2-1/2" circle punch. Double layer the tree to give it a pop-up look. 
it's not your eyes...this is a blurry photo...sorry!
Inside...that's some old patterned paper, Be of Good Cheer!  It always comes in handy eventually :)

Anyway, these are quick and easy for those last minute cards you need for folks.  
Have a blessed and creative day!

SUPPLIES:
STAMPS:  Festival of Trees bundle with punch
INK:  Memento Tuxedo Black, Garden Green, Cherry Cobbler
PAPER: Cherry Cobbler, Whisper White, Garden Green, Beof Good Cheer DSP-retired, Gold Glimmer
EMBELLISHMENTS:  Cheery Cobbler Dazzling Details, Baked Brown Sugar thick twine, Swiss dots embossing folder, 2-1/2"circle punch, Itty Bitty Accents punch pack(star), 


Monday, December 15, 2014

5 Minute Christmas Card From Leftover Parts HSSSC201

Pin It Now! So, I was on my way out of town at 4:30 this morning. Packed and prepped for a 1,000 mile trip to Dallas, and I'm taking my final walk through, when suddenly I realize that I need to - WANT to - make my card for the HSS DT that needs to post Monday. And I don't return til Tuesday!  Dilemma.  I realize I have exactly 5 minutes before my hubby comes looking for me. Looking around at my blown-up desk from gift making, I find the parts to make this card...
Every bit of this card was tucked here and there. 
Tag parts from last year. 
Santa for gift card holders I made for a friend. 
Scraps of retired DSP - it's actually 2 pieces hidden behind that white tag. 
Oh, and the JOY!  From the Watercolor kit!  It's cut from "joyeaux". 
Here's the sketch:
I have to admit, I didn't even have the sketch I the same room while making my card...just made it from memory. The key element I remembered was the circle. It's close enough for me :)
I did cut the card base at 3-3/4" x 5-1/2" so the Santa tag could hang off a bit. 

So what do you think?  Do you have a few minutes to make a "Franken-card" from your scraps?!  I'd love to see what you do!  

Have a blessed and creative day~ Erika 


Monday, December 1, 2014

An Icy Color Combo for Christmas & Hanukkah! HSS200

Pin It Now! I can't believe Hand Stamped Sentiments is hitting this huge milestone...200 crafty challenges!  I've been with them for over two years now, and it's been so fun and such a blast.

This week the challenge is a unique color combo.  It had me scratching my head, but I came up with a design that was great for both Christmas and Hanukkah!
Look at these colors!  So cool and crisp. 
A closer look at them...My final Christmas design features Ornamental Pine embossed with Smoky Slate Stampin' Emboss, and rubbed with a sponge and Tempting Turquoise ink.  I like the glow that it gives the Pool Party cardstock. 
I decided to try it out with my Hanukkah stamp - lovely! 
And my first design, basically the same as the first Christmas card, but without the stepped up embellishments.  This is a great card for mailing!
Won't you join us at Hand Stamped Sentiments this week?  I'd love to see how you're inspired!

SUPPLIES:
STAMPS: Happy Hanukkah, Ornamental Pine
INK:  Tempting Turquoise, Versamark, Stampin Emboss White
PAPER:  Whisper White, Pool Party, Smoky Slate
EMBELLISHMENTS:  Tea Lace Doilies, Frosted Sequins, Basic Rhinestones, Pool Party Thick Twine, Pool Party Bakers Twine
OTHER: 1/8" white satin ribbon (Hanukkah card)


Monday, November 17, 2014

Santa Stache with a Simple Sketch

Pin It Now! Love my Santa Stache!  This is a too-cute set that's easy to color and packs a punch.  The coordinating Framelits moustache makes it way cuter!
We have a great, simple sketch at HSS for the next two weeks.  Use it to get started on Christmas cards!  I followed the sketch exactly and I love the results. Clean, bright, and symmetrical.  
A right jolly old elf, eh?  Love the Blendabilities to color him with. This is a great stamp to try them out with. Not much coloring, so what you do really stands out.  I used the Cherry Cobbler set and the skin tone assortment.  
Swing on over to Hand Stamped Sentiments and give this sketch a try!  I can't wait to see what you do!

SUPPLIES:
STAMPS:  Santa Stache
INK:  Memento Black, Blendabilities Cherry Cobbler/Skin Tone assortment, Early Espresso
PAPER:  Trim the Tree DSP stack, Cherry Cobbler, Early Espresso, Whisper White
EMBELLISHMENTS:  Cherry Cobbler 1" Sheer Linen Ribbon, Linen Thread, Sequin Assortment
Other:  Ovals cutting tool (Creative Memories), Corner rounding tool (Fiskars)

Monday, November 3, 2014

Clean & Simple Christmas Cheer

Pin It Now! I've decided to use a clean and simple card for mailing at Christmas this year.

What I haven't decided is which card to use!  The next few posts will feature my mailable, CAS Christmas card series.  The DSP will provide most of the embellishment, and the sentiment will be clear and bold!

Here's one featuring Nordic Noel DSP, Cheerful Christmas stamp set, and a couple of embellishments.
The color pallette is from our latest challenge at Hand Stamped Sentiments!  Love these holiday season colors!
I substituted the Garden Green for the dark shade of Old Olive Blendabilities. These markers work great for so many techniques!  This time I used one to color the pine boughs that were heat embossed with white.
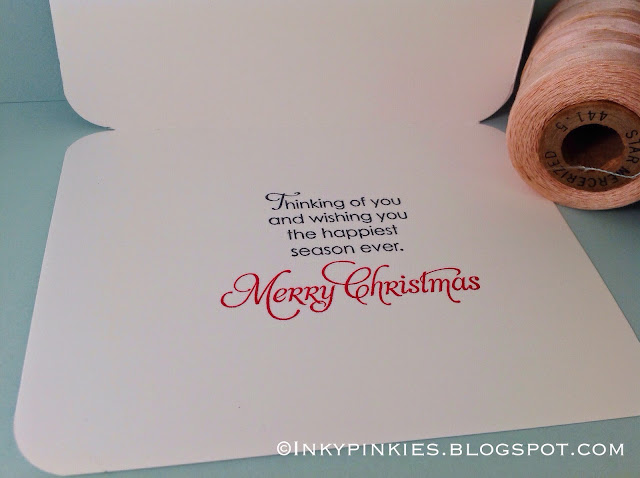
Inside, Christmas merriness!
I think the rounded corners add a little more interest to my mailable card.  The little strip of black and white, too.  I have learned this cool look from one of our 2014-2015 Artisans, Teneale Williams.  She is a master of graphic design!
Have a blessed and creative day!  ~ erika

SUPPLY LIST:
STAMPS:  Cheerful Christmas, More Merry Messages
INK:  White Stampin' Emboss, Basic Black, Real Red, Blendabilities Old Olive
PAPER:  Nordic Noel DSP, Typeset Specialty DSP, Whisper White, Real Red,  Basic Black
EMBELLISHMENTS:  Frosted Sequins, Basic Rhinestones
OTHER:  Corner rounding punch (Fiskars)

Nordic Noel Dazzles With No Embellishments!

Pin It Now! A mailable, barely lumpy Christmas card for you today!

I'm working on my Christmas cards to mail out in just a few weeks.  Already! Wow!

This one lets the DSP do most of the talkin', and a little glimmer paper to make it pop.
There's a challenge at Christmas Card Challenges to create a card with NO embellishments, and this one made me joyful!  When it came time to stick something extra on it, I said NOPE!  We are done.  How liberating! Thanks, CCC!
Inside.
Do you dare to make a card with no ribbon?  Rhinestones?  Buttons? Sequins??? I dare you to try!
Have a blessed and creative day!  ~ Erika

SUPPLY LIST:
STAMPS:  Heart of Christmas (retired), More Merry Messages
INK:  White Stampin Emboss, Basic Black, Real Red
PAPER:  Nordic Noel DSP, Typeset Specialty, Basic Black, Red Glimmer Paper, Whisper White


Monday, October 27, 2014

Happy Halloween with Holiday Home

Pin It Now!
I was finding myself short-handed on Halloween cards to mail out this week, so I made up a batch of these clean and simple cards with the Holiday Home bundle. 
The house was heat embossed with Smoky Slate powder, die cut with the coordinating Framelit, and then I also die cut the white cardstock and inlaid the house so that it's flat on the card.  I think it looks more CAS this way, and the stars add texture.

Isn't that spider web cute?

The "Happy Halloween: sentiment is cut from one of the Apothecary Accents Framelits, and cut about 2/3 up. 
That orange ribbon? It's very retired Sycamore Street from a past Sale-A-Bration. Using the stash!  
Have a blessed and creative day! ~ Erika

Supply List:
STAMPS:  Holiday Home, Delightful Dozen (Ret)
INK:  Memento Tuxedo Black, Blackberry Bliss, Tangelo Twist
PAPER:  Moonlight DSP Stack, Whisper White, Basic Black
EMBELLISHMENTS:  Basic Rhinestone, retired orange ribbon
BIG SHOT:  Lucky Stars embossing folder, Homemade Holiday Framelits, Apothecary Accents Framelits

Monday, October 20, 2014

Terrific Trendy Sketch - 2 Ways! HSS197

Pin It Now! I was thrilled to be able to work with this lovely sketch at Handstamped Sentiments, courtesy of the talented Elizabeth Price!  Very fun.

I love the offset panel trend.  It lends an unexpected element to the typical rectangular greeting card.
The cut background is a nice way to break up a pattern.  I added gold embossing to an Autumn Wooden Element.  I hugged the tiny package of these when they arrived in my Stampin' Up! order. They are endlessly cute.  Much thinner than the big box craft stores' wood embellishments, so they're much better to use on a card that you're going to send.
I originally created the stamped strip panel at 4" x 5-1/4" out of habit, and realized the sketch called for a shorter one.  So I used the extra to decorate the inside.  
I was so crazy about this sketch, that I made a second card. While cleaning up from the first, I noticed my washi tape stack, and thought it would work great for a quick, clean card.  This was easy!  I cut the angled panel twice, stamped the greeting on the bottom piece, and used the large oval punch on the top panel to make a window.   A little sequin trim and linen thread bow, and it's simple, sweet, and ready to send. 
Head on over to Hand Stamped Sentiments for more inspiration on this fabulous sketch!  I'd love to see what you're inspired to create!

SUPPLIES:
STAMPS:  For All Things, Petite Pairs,Hardwood 
INK: Cherry Cobbler, Mossy Meadow, Hello Honey, Always Artichoke, Crumb Cake, Soft Suede, Gold Embossing, Early Espresso
PAPER:  Cherry Cobbler, Mossy Meadow, Very Vanilla
EMBELLISHMENTS:  Gold Sequin Trim, Autumn Wooden Elements, Linen Thread, Gold 5/8" Satin Ribbon, Gold Washi Tape
PUNCHES: Large Oval


Saturday, October 18, 2014

For All Things

Pin It Now! Today, I'm giving thanks for this sweet new stamp set, and an hour to play with it.

I love stamping scattered leaves!  I never get tired of a nice autumn set.

The sentiment is die cut with Chalk Talk Framelits, and backed with a couple of punches cut in half. 

And check out that acorn wooden embellishment! I painted it with some old Smooches I keep close by. It's super sweet plain, too. 
Inside, a little extra stampiness.

I was inspired by the color combo of this beautiful dish from the VIETRI site, found on the Saturday inspiration challenge at Splitcoast Stampers. Cute!  

Have a blessed and creative day! 

SUPPLIES:
STAMPS: For All Things
INK: Cherry Cobbler, Mossy Meadow, Crumb Cake, Soft Suede, Hello Honey
PAPER:  Cherry Cobbler, Very Vanilla
EMBELLISHMENTS:   Autumn Wooden Elements, Filigree Frames embossing folder, Cherry Cobbler seam binding ribbon, Baked Brown Sugar thick twine, Chalk Talk Framelits
OTHER: Gold Lame' Smooches paint