Wednesday, March 14, 2012

Summer Smooches Early Peeks!

Pin It Now! I got a new shipment of fresh summery supplies, right on the tail end of a weekend at the beach!  I wanted to scrap this photo of my boys dipping their toes in the Gulf, and tell the story that my younger son told me this morning.  {I just love it when they get along!} These bright, cheerful patterns are just right for the beautiful blue water and sky.

I prefer a simple, scrappy design on most of my layouts, that are a little inky, but keep a lot of neutral space so that the photos really stand out.

The title on this layout is "Warm My Heart".  I used the Petite Pennants punch for the banner triangles, punched from the new DSP set, Summer Smooches.  I alternated rectangular banner pieces, they're 1-1/4" x 1", and stamped with a blossom image from the new Bright Blossoms stamp set, available June 1.  Before adhering the banner across the layout, I flipped the triangles over and used them as a mask with Shimmer Paint and a sponge to repeat the banner pattern between the large and smaller pictures.  I also used the Spritzing Tool to add some fine spritzes of Soft Suede. 


I sponged and added the tiniest bit of glitter to the title letters with a flat round paintbrush. 


I had a lot of scraps left on my table, so I made a card to match, inspired by the theme of the layout...my sweet boys helping each other and playing so nicely together {it's not always like that, lol}


It's a fairly clean and simple layout, but I added a quilled paper flower with (another new item!) a Summer Smooches Designer Fabric Brad.  The leaves are from the same stamp set, Bright Blossoms.


The flower adds a lot of dimension and texture to the card, with the wonderful fabric and bright patterns.


If you'd like to make one for yourself, it's super easy! I put together a little visual tutorial below.  It's just a strip of any DSP 12" x 3/4".  Thinner patterned paper works much better than cardstock.
 A couple of tips:  Stick a glue dot on the end of your piercing tool before beginning to wind it tightly onto the end.  Keep the "good side" in.  Use a glue dot here and there while rolling to help keep it from loosening, and one more when finished rolling.  Place it flat on your work surface, and gently fold the cut "petals outward, into a blossom.  Work them around a little.  Finally, press a large brad firmly into the center, and the petals will splay outward.  So easy!

I hope you've enjoyed my little project!  If you make a flower, please link up in the comments section, I'd love to see what you do!

P.S....I'm submitting this blog post as a "tryout" for my very favorite weekly challenge site, Hand Stamped Sentiments. I love that their challenges vary by theme, and they encourage scrapbooking and other projects, as well as greeting cards.  I highly recommend their challenges, even if you don't submit your own projects, for the wonderful inspiration you'll find by the team members and the bloggers that play along.   So...wish me luck! :D 

Have a blessed & creative day! Erika.

Sunday, March 11, 2012

Tickets & Tags Mini Album {Scrapbooking}

Pin It Now! Remember this post from last week, when I packed up a pittance of scrap supplies and headed south for a week?

I'm happy to say, mission complete!  I photographed our trip, prepped and completed my minibook, before we went home :D

Here are a few shots of the finished album...


Here's the cover, with some basic grey ribbon stapled on.

Lots of ribbon scraps, but just a few colors...Pool Party, Basic Grey, Very Vanilla.


I tied a few tiny seashells that we collected to the ribbon with linen thread.  Some had holes naturally, others I poked carefully with a paper piercing tool.  That's my baby on the beach <3


I made a little pull-out flip book with 3 photos by simply accordion folding a piece of patterned paper, and adhering them in the valley folds.  The tabs on top are the "tickets" from the Tickets & Tags kit, folded in half.

The layout on the left is torn strips of sticker DSP from the kit, I thought they made neat fake washi tape!


Not all the tag inserts needed a story or photo. So I used a few to just embellish with the pretty die cuts included in the kit.  Here's a tip * If you want to layer the stickers, sprinkle the backs with baby powder, it eliminates the sticky adhesive instantly, so you can bend and layer without all the flatness (is that a word?).


Here, I adhered some shark's teeth from the beach onto Whisper White satin ribbon. They look pretty, nestled in the folds like the sea's waves.


Since the kit came with all these wonderful coordinating die cut stickers, all I had to do was layer, ink a little, and embellish a bit.  Love these circles and flowers, and the cool tags keep it a little edgy.


Another tag just layered with the die cuts.  They are SO fun.  No mess, no adhesive needed.  Even the ric-rac stems are stickers from the kit.


Here's a little detail I added with a few snips.  A miniature file folder! Just cut a piece of DSP 1/2" taller and a little more than twice as wide as the photo (mine was a 4x4).  Fold in half, leaving an extra inch on the bottom half, and hand cut a little tab for the file folder part (you've seen them a million times, you can do it!). Mount a pic on the front, one inside, and a journaling block inside. I added some linen thread and a bitty button to finish it off.


Every paper and die cut in my album was from Stampin' Up!'s Tickets and Tags Simply Scrappin' kit.  You can click here to see them on my online store.

The mini album base was one from my stash from Melissa Frances.  I covered all the base pages with patterned paper or textured cardstock from the kit.  You can make a minibook out of so many things...office envelopes, tags, vintage children's books, or just flat squares of cardstock hole punched and ring bound.  Here's the packaging from my minibook base:

I think it's about $5.00 on her site.


Scrapbooking was my first papercrafting passion.  I love capturing these little moments.  And the BEST part was when I heard my hubby talking to his aunt about the trip, and he stopped and said, "Hey babe, where's that album you made? I want to show Esther."  YES!!!  It's right here.  hee hee!

Thanks for joining me! 


I'd love to help out if you have any questions about supplies or techniques used. Just email me or leave a comment if I can help. 

Have a blessed & creative day! Erika. www.erikaclark.stampinup.net

Saturday, March 10, 2012

Cards with COOL MOVES! Spring Shadowbox!

Pin It Now! I'm SO thrilled about this round of UStamp with Dawn and Friends! 

We're doing all gorgeous card sets, and ALL of them have a card with a Cool Move...shaking, popping, sliding, exploding....you know what I'm talking about! 

This is my first project, and it's a BONUS early bird project, as the official every day posting will begin March 23rd.  It's called Springtime Shadowbox and Occasion Cards.  I love the colors!  So fresh and springy!  And do you recognize the DSP?  You probably have it in your stash right now, it's Pocketful of Posies, a release from last year's Idea Book & Catalog. 

My Cool Move card is a Mother's Day card with a pop-up windowbox inside.  The lower shots show this card opened and closed.  I LOVE fancy folds and origami of all kinds, so this was a fun challenge for me!


The second card is a St. Patrick's Day banner card! A punched shamrock, set on a scalloped centerpiece, and the inside is just as pretty. ...and the tutorial contains an alternate non-St. Patrick's version. Here's a hint....it used lots of luscious golden glitter :)

The third is a punched bird card, alternating and repeating papers for a cool graphic look.  Pretty details and easy to do!

I hope I've enticed you to give Ustamp With Dawn and Friends a try!  If you'd like to check out my tutorial and more than 50 others for only $24.99, plus prizes, chats, and galleries just for you, click here to visit the site.

Sunday, March 4, 2012

Tickled Pink Party!

Pin It Now!
A couple of weeks ago I hosted a workshop & swap with a PINK THEME!  Every little detail had some pink infused in it.  I wanted to share a few of the pics and ideas with you, incase you have a little princess or queenies that would like to party pink with you...

Here's my table all set for my workshop ladies. 
I made about a dozen tissue paper pom-poms, you can view a YouTube video how-to here.
They really added a fun flair!

 Here is my CANDY BUFFET! I created a tutorial for the apothecary jars, there's a link to the membership site here, I highly recommend this fun site!  There are some other fun items, a glittered wood block "Be Mine", pink bottlebrush tree that I'm so in love with, and a pretty embellished pillar candle.

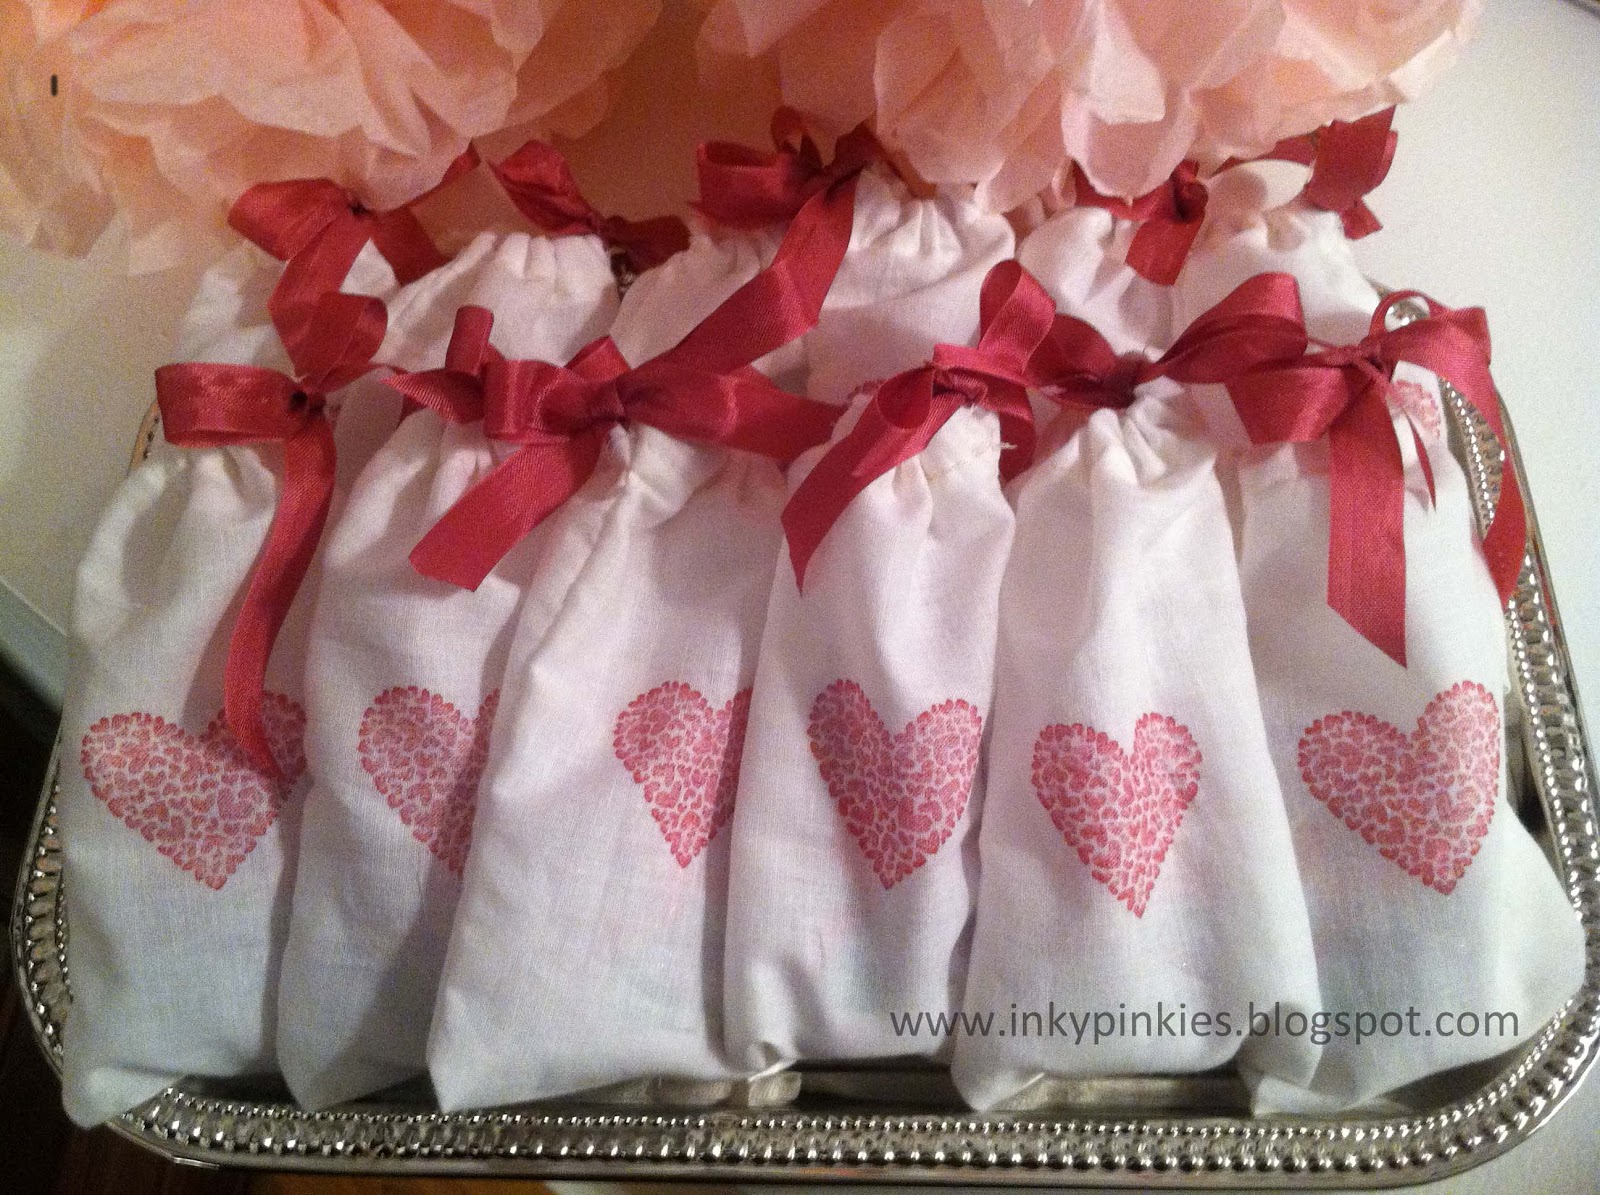
 These were my party favors, they're handmade little muslin bags, I posted a tutorial for those here.
 What would a PINK PARTY be without PINK YUMMY FOOD?
Here are my Pink Lemonade Cupcakes.  They're easy and awesome!  My recipe is this:  White box cake cupcakes.  Make fresh buttercream icing (3C confectioner's sugar, 1 stick softened butter, 2T milk), but replace the milk in the recipe for frozen pink lemonade concentrate.  Needs no additional color or flavoring!  Amazingly pretty and yummy!
 Below are bottled water wrapped in patterned paper (Beau Chateau SU!), and sugar cookies topped with M&M's.  The sugar cookies were melt-in-your-mouth.  The recipe is from Allrecipes.com and you can find it here.
 Finally, here's a pic of my lovely friends enjoying themselves at the party.  Make and takes, Sale-A-Bration shopping, and card swaps.  And all the wonderful sweets :)

Apothecary Candy Buffet

Pin It Now!
One more time this round, I've designed a pretty project for UStamp With Dawn and Friends!! Big Shot Roundup. 

Here's a yummy Candy Buffet.  It's a cinch to put together, and makes a fabulous display for your wedding, birthday, stamping event, or everyday organization. 

This tutorial includes jar decoration, embossed candy bags, thank-you notes, and envelopes to match.  It will pull your party together and make you look like the Hostess With The Mostest {which you are, of course}!  There's also a recipe and instructions for the pretty cake pops pictured . 

If you are interested in checking out this and FIFTY more world class projects, for $24.99 for a three month membership, click here to be taken to UStamp With Dawn and Friends!! Big Shot Roundup!!

Saturday, March 3, 2012

Don't leave home without it!

Pin It Now! Your scrap supplies, that is!

I'm leaving to fly to Southern Parts Unknown this morning, and normally I drive and bring with me three bins of craft product in my family Suburban. It goes in before food. And the cats (2 of them). But since we're flying commercial air, momma had to pack light. And by light, I mean I didn't even want my husband to know its in the suitcase!


So I came up with this brilliant solution. I grabbed a Priority Mailer from the post office. Covered it with patterned paper to make it pretty. Then packed it with the bare basics to scrap a mini album while I'm gone! I have some fun goodies tucked in, including an entire Simply Scrappin' Tickets & Tags kit, mini album starter from my stash, trimmer, stapler, adhesive, and a clear wood mount case full of embellishments. That should do just fine ;)


Here's a quickie on how to dress up an unattractive repurposed box...


I'll be posting the creation of the mini album on my limited supplies over this coming week. Wish me luck & lots of crafty time!

Have a blessed & creative day! Erika. www.erikaclark.stampinup.net

Wednesday, February 29, 2012

Butterflies & Blossoms Layout & Trinket Box

Pin It Now!

I am so honored to be designing projects for Ustamp With Dawn and Friends, and today my latest project premiered on her site!


It's a 6" x 6" layout with easel back, matching card and "trinket" box.  I designed it with a specific use in mind - to document the memory of a loved one or a cherished time, and tuck mementos in the box. 

I want to share with you how I finished my project. 

My sweet Gram passed away in May of last year.  She was an everyday part of my life for so many years, but particularly the last five, when she suffered from Alzheimers Disease and slowly came to need everyday care.  Dealing with a loved one with memory loss is very difficult, but as in all things, there are blessings that come from these times.  She loved my children fiercely, always wore a smile, and was my constant cheerleader.  So, I finished this little layout and box to capture the good times and hold a few keepsakes of the times I'm grateful for.
Here's us...


Here is the finished trinket box...there's a locket with curls from MY first haircut that she always kept :), and some little things she kept beside her.


I made little picture cards with journaling blocks on the back.  They're 2-1/4" x 3-1/4" on Poppy Parade, with 2"x2" squares of Very Vanilla, stamped with the lined journaler and date stamp from Notes & Details.  Die cut butterflies from Beautiful Wings Embosslits are the only embellishment.  Keep it simple, and repetition works!


Thanks so much for looking!  You really should check out all of the wonderful projects Ustamp With Dawn has to offer.  It's $24.99 for three months of access to 40+projects, chats, and community events.  Here's the link: http://bigshotroundupuswdaf2012.ning.com/main/authorization/signIn?target=http%3A%2F%2Fbigshotroundupuswdaf2012.ning.com%2F


Have a blessed & creative day! Erika. www.erikaclark.stampinup.net