Here are a few of the projects we made...
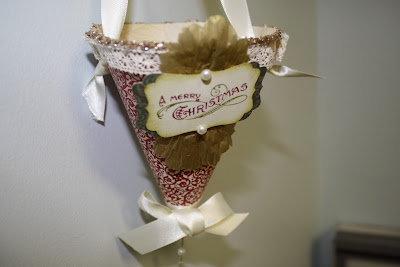
VICTORIAN CHRISTMAS CONE
Our first project of the evening was this gorgeous paper cone, with gobs of pretty details! It may look a bit involved, but even the complete newbies did a *fantastic* job! Here are the instructions:
Cut the circle in half, and you have a template for 2 cones.
Run the paper across the edge of the table a few times to loosen up the fibers in the paper, making it easier to roll into a cone.
Use tacky glue or adhesive on ½ of the straight edge, roll into a cone and adhere. You may need another dot of adhesive on the inside corner to keep it neat.
Decorate as you wish! I added crochet ribbon, satin ribbon, champagne glitter glass, mini pearls, waffle paper, and linen thread, all available in the Holiday Mini Catalog. Please contact me if you want to make some of your own!
Next was the Tea Light Box. These are fantastic looking gifts, and so easy and inexpensive to make! I got the instructions from Jill's Card Creations' blog, and was a BIG hit!
Finally, we had a big tag party. Punches, inkpads, brush markers, bling, pearls, and ribbon everywhere! I put mine in a mason jar decorated with Striped Grosgrain Ribbon and DSP from the Holiday Mini Catalog.
 |
| A PRESENT FOR MY WORKSHOP LADIES! NOBODY LEAVES WITHOUT A SINCERE "THANK YOU" |
Cut a piece of patterned paper for the outside of the purse 7"x4". Find the center mark and score at 3" and 4".
Cut a piece of solid cardstock for the inside of the purse at 6 3/4" x 3 3/4", find the center mark, and score at 1/2" of each side of the center. The score lines will match the outside paper, leaving an even border all the way around. Make one more score line 1/2" from the second score line, which will be the backside of the purse.
Make two cuts with a craft blade from the first score line across the second, and ending at the 3rd, all the way across them. They should be 1-1/2" apart. Lift up the flap you have cut and you should be able to insert the lip gloss.
Adhere the inside & outside pieces, fold, and decorate at desired!
 |
| HERE'S THE INSIDE OF THE LIP GLOSS PURSE |


No comments:
Post a Comment